

Looking good! what are you going to do with you vent?
-Mark
14 Mojo - 72 hours and growing
02 Mobius LSV ---- Sold and always will be remembered as the one that started it all.
"Hey you only live once"
8 gauge wire for the transom LEDS? that seems a little extreme, how much power do they pull??
David
2017 Moomba Mojo Max Surf Edition, 2 Pair Wetsounds Rev10s powered by an SD2, 6 pair Wetsounds XS650M and Wetsounds XS12 powered by SD6 all controlled by a WS420. 2 Lumitec SeaBlaze X2 Spectrum underwater lights
SOLD***2008 Mobius LSV, Gravity III , Wake Plate, Z5, Exile SX65c's, Exile XM9s, Exile XI12D, Exile Javelin, Exile 30.2***SOLD
whats the status on the chrome engine compartment vents?
David
2017 Moomba Mojo Max Surf Edition, 2 Pair Wetsounds Rev10s powered by an SD2, 6 pair Wetsounds XS650M and Wetsounds XS12 powered by SD6 all controlled by a WS420. 2 Lumitec SeaBlaze X2 Spectrum underwater lights
SOLD***2008 Mobius LSV, Gravity III , Wake Plate, Z5, Exile SX65c's, Exile XM9s, Exile XI12D, Exile Javelin, Exile 30.2***SOLD
They are sitting in the holes, I just need to connect the hoses.
2013 Outback V
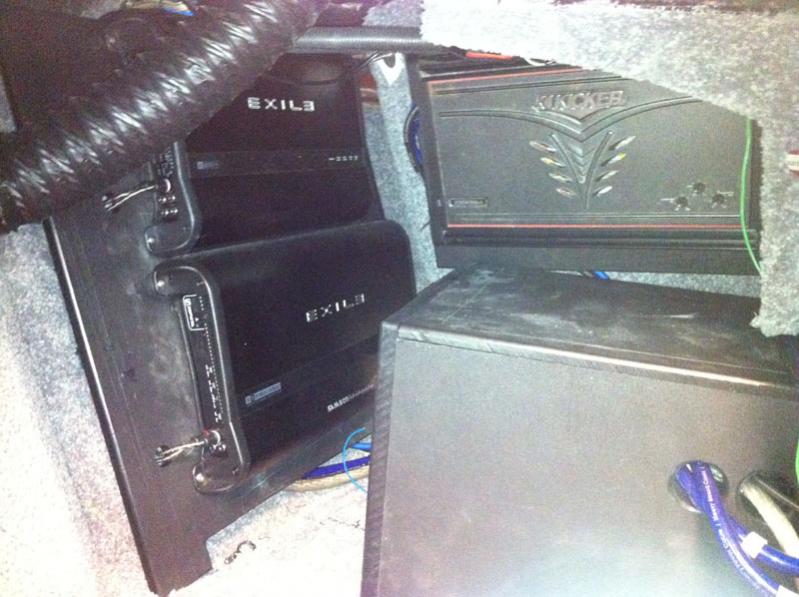
More progress from last night - I got the batteries in, cabin speakers mounted, and head-unit mounted and wired up - this is huge, as I can now listen to tunes on the boat stereo while I work, rather than the tiny iPhone speakers, lol. I also got the sub amp mounted and partially wired (need to fish the speaker wire and hook up the turn-on wire). I also got the wires run for the left side tower speaker.
Headunit in its new location, where it would have been from the factory had I ordered it with a radio:
I need to get a trim ring for the faceplate, somehow I managed to lose the original.
Cabin speakers in their factory locations (I used to have them on a separate panel in that opening under the stripes:
I haven't connected any of the LEDs yet, as I'm waiting for my wife to give me the rings for the speakers on my birthday in a few weeks, which is why there are wires hanging around in this picture.
Amps mounted and the batteries in place. This picture makes it evident that I need to tilt the mounting board for the Kicker amp - weird, I couldn't see it in person, but it makes me mental in the picture, lol:

2013 Outback V
The first time I ran the speaker wires through my tower it was an absolute nightmare - like a few hours per side trying to fish wire through a tiny hole and get it to come out the other end.
The other day at Home Depot I ran across this little gem, intended to aide in the fishing of wires through walls. For $14 it is a must have for anyone considering a tower speaker install. I was able to fish the wire on one side in about 10 minutes, including time to drill!
This is how I will mount the quick-release brackets - same location as my previous speaker install, even used one of the same holes. I need to get longer bolts to mount the bracket, hence the finger holding it in place for the picture, haha.
To get the wires from the oval bar into the front downtube I had to drill a hole through the downtube and into the oval tube - to cover that hole I will use a stainless steel plug, should make it blend right in.
2013 Outback V
I spent some time working on the sub enclosure this weekend - a little more time that I expected actually, lol. I decided to go with Birch wood for the box, instead of a synthetic material. The reason being that I was completely winging the measurements with the compound curves, and at $18/ft using Starboard or similar would yeild some expensive mistakes.
What I've come up with is about 2.4 cubic feet, that will have an external port tuned to ~35 hz, and house 2x 10" Kicker L7s. I decided to go this route at the suggestion of Phil from Kicker.
My work area - it was so nice out I decided to drag my tools outside and work in the driveway, rather than my basement;
Piecing the box together - this is where I made a crutial mistake that I didn't realize until I tried to put the box into the boat - what is the mistake...
...the mistake was that I built the box backwards, LOL! Fortunately, I did not glue, and only used the pnumatic nail gun, and hadn't put in any batons yet - so all I had to do to correct was pry it apart, pull all of the nails, and re-build the correct way. I need to cut 2 new pieces based on the angles, but that won't be an issue at all;
Once I get the sides cut I'll get it in the boat for a test fit and mark where my port will go - I'm thinking that it will come out of the top left side, and vent forward, but I need to measure the clearance before I start cutting.
2013 Outback V
Lol I was looking at the pics before I read the post and though to my self "how in heck is that going to fit under the dash".
That sucks, sorry man.
How many cubes you getting out of that box? You doing a slot port?
Speakers in the panels look really nice. Nice work so far. Cant wait to see the 3 Transome LED's in the water.
PWI as usual...
It's like 2.4 cubic feet, roughly.
Slot port through the top, facing forward.
I am going to start the LEDs once this is done, hopefully by the end of the week
2013 Outback V