Member
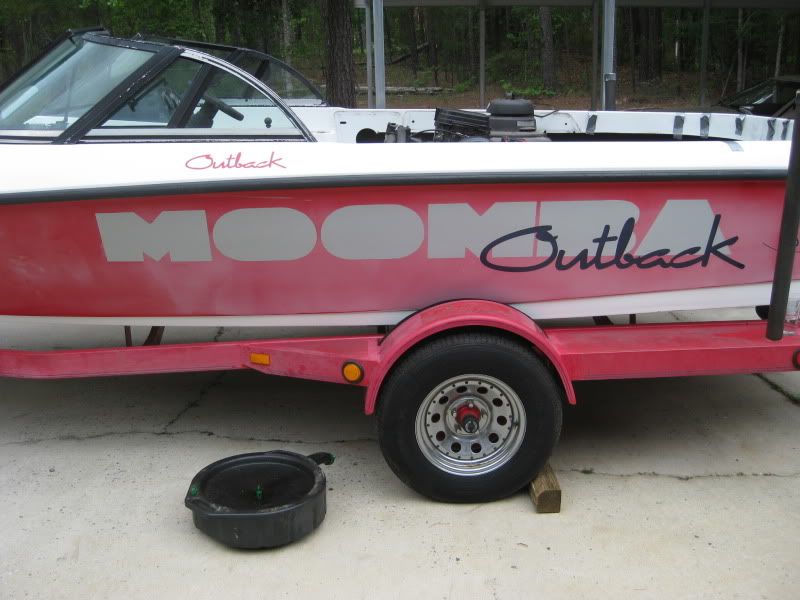
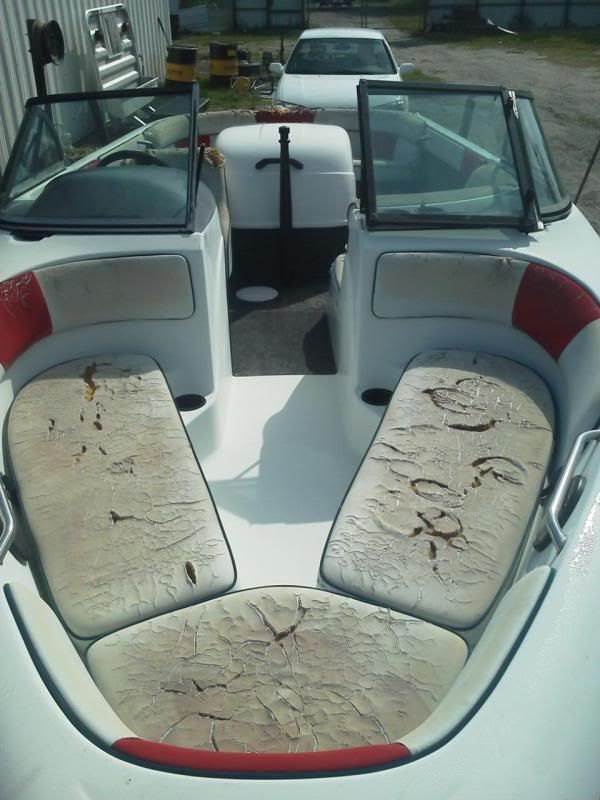
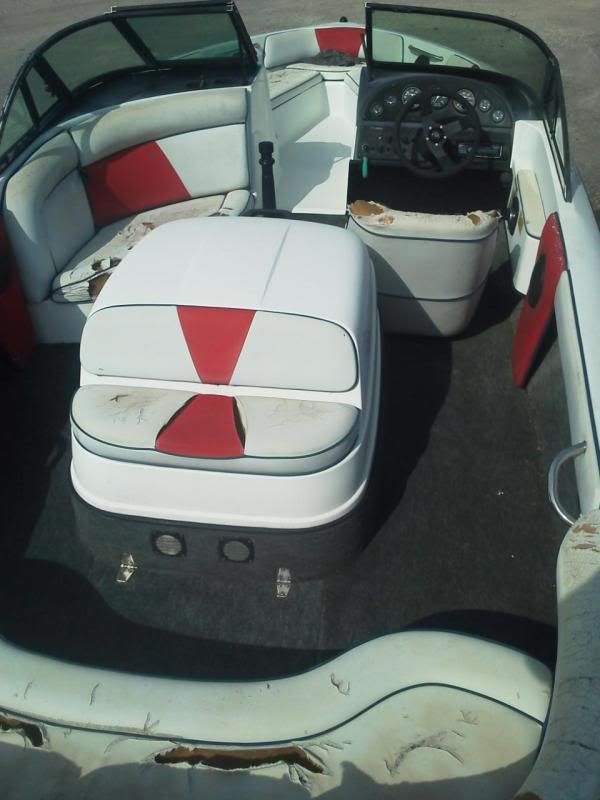
I picked up this '98 Outback from close to Jacksonville, FL almost two months ago. It was obvious it was never taken care of, never covered, and never waxed, but it only had 320 hrs on the clock. I knew it needed a little work, all new interior, and some gel coat work but didn't know it would need a Transom repair. There were gel coat cracks all around the swim platform mounting brackets and I could actually pick up on the platform and watch the transom flex around the brackets. I could also see it had been messed with before because there was blue rtv around the bolts and brackets.
Luckily I only paid enough for it that after the repairs I would still be right at the NADA price for a boat in "good condition." Plus I figured that for what I paid, I could at least part it out for that much.
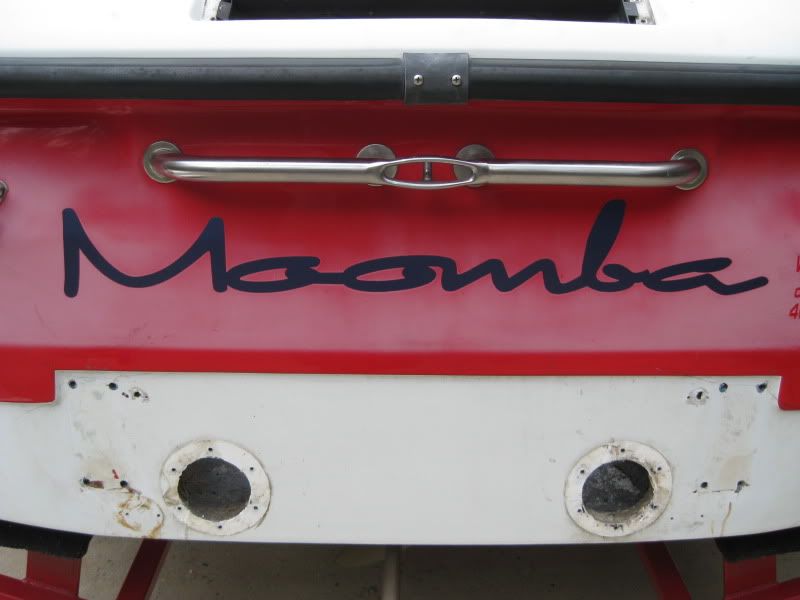
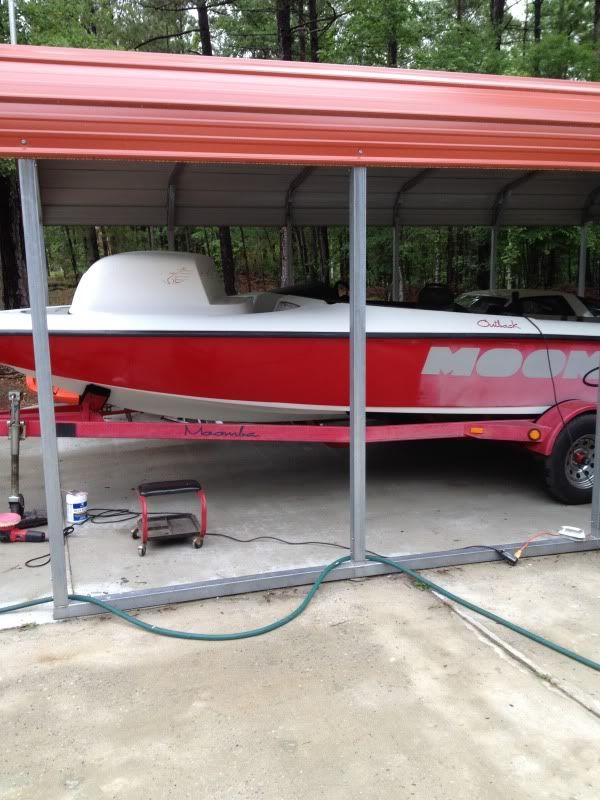
Here's what it looked like when I bought it.

Last edited by 98Roo; 06-09-2012 at 12:46 PM.
Member
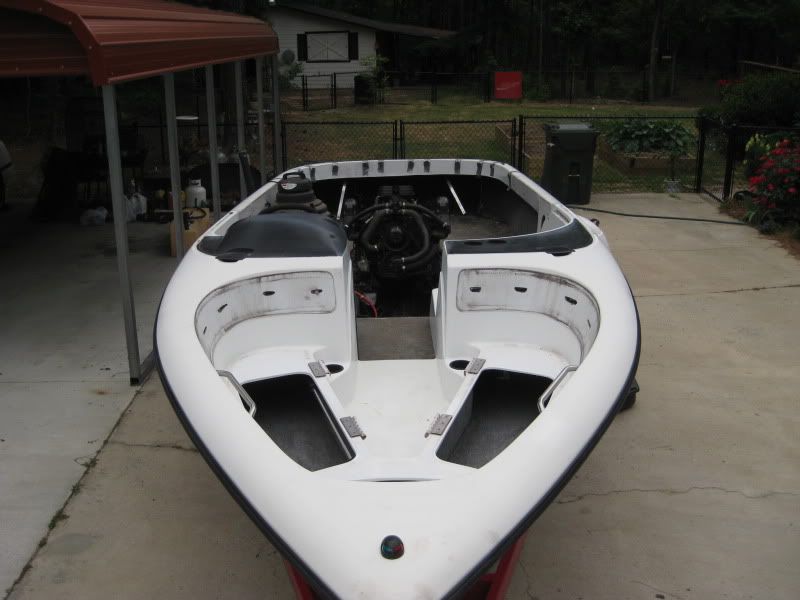
After I got it home I started tearing into it. Ripped all the interior and carpet out and removed the windshield to get repainted. I also started digging into the transom to see what repairs it would need.

Member
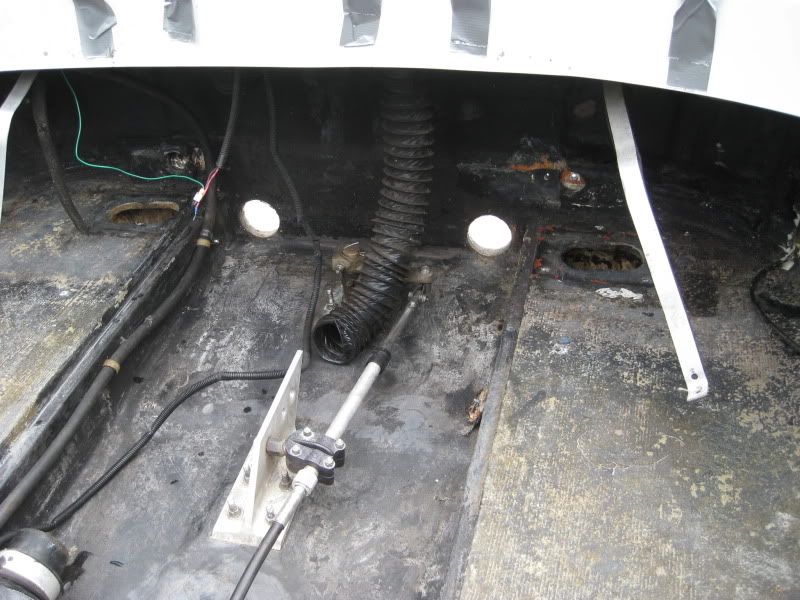
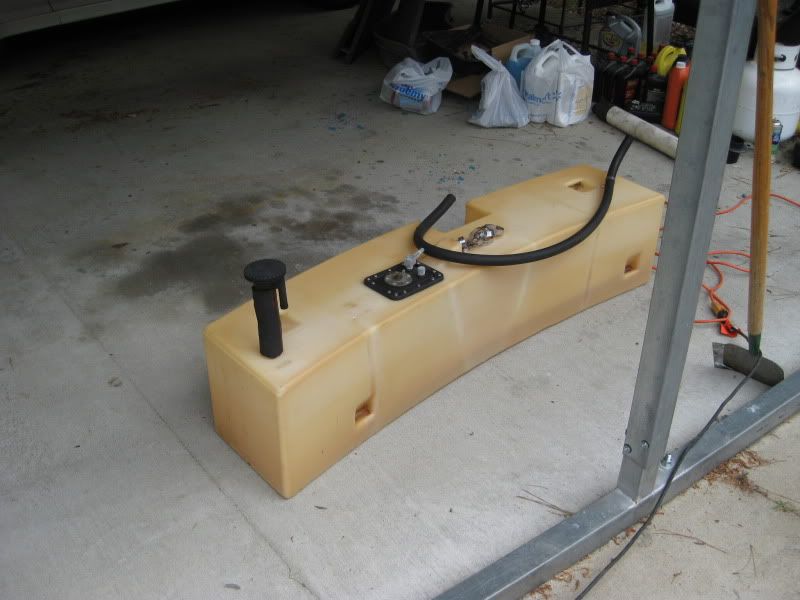
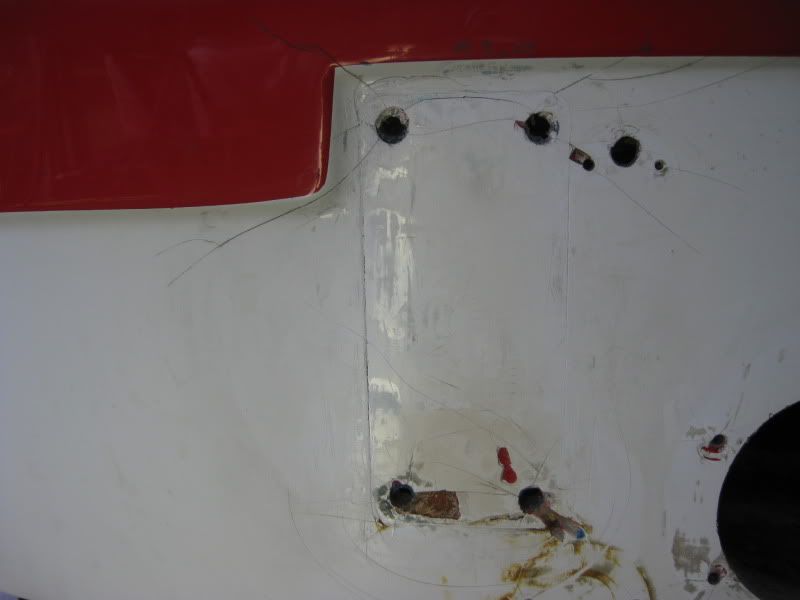
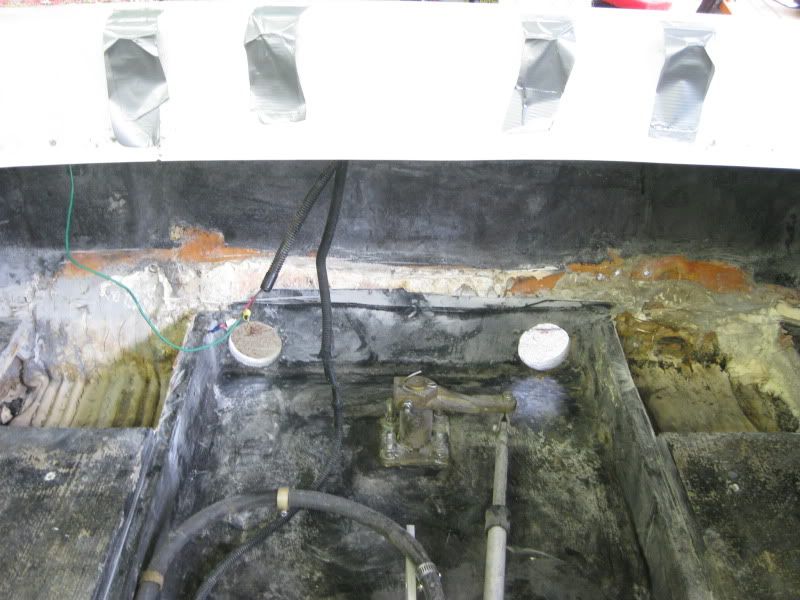
Also started cleaning up some things like the gas tank which was filthy. You can see the access holes the previous owner cut into the floor to access the swim platform pieces. He put in two small pieces of steel plate and washers on the bottom two holes of the brackets. He cut out the mounting "pad" with a hole saw to put the washers in with thru bolts. This is why the transom gel coat cracked so bad because it was just a thin layer of fiberglass and gelcoat supporting the swim platform.
More to come.
Last edited by 98Roo; 06-09-2012 at 12:43 PM.
Member
Here's a few shots of the transom after everything was removed. I also cut the floor back a bit to get a look at what I was dealing with. I forgot to get before pictures of the "pads" that the lag bolts screw into before I cut them out. They were just square piece of plastic sandwiched between fiberglass and glassed to the transom.
Senior Member
Sweet post. Nice pics of the progress. That motor looks really good, especially compared to the rest of the boat.
1997 MasterCraft 205
2008 Moomba Outback
1999 MasterCraft Sportstar OB
1992 MasterCraft 205
1999 Malibu Response LX
1987 Marlin Magnum Skier
Member
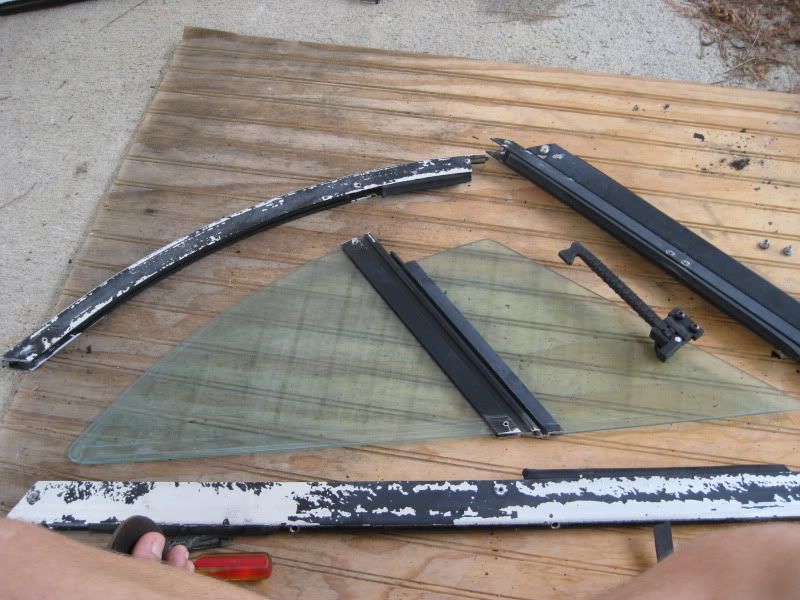
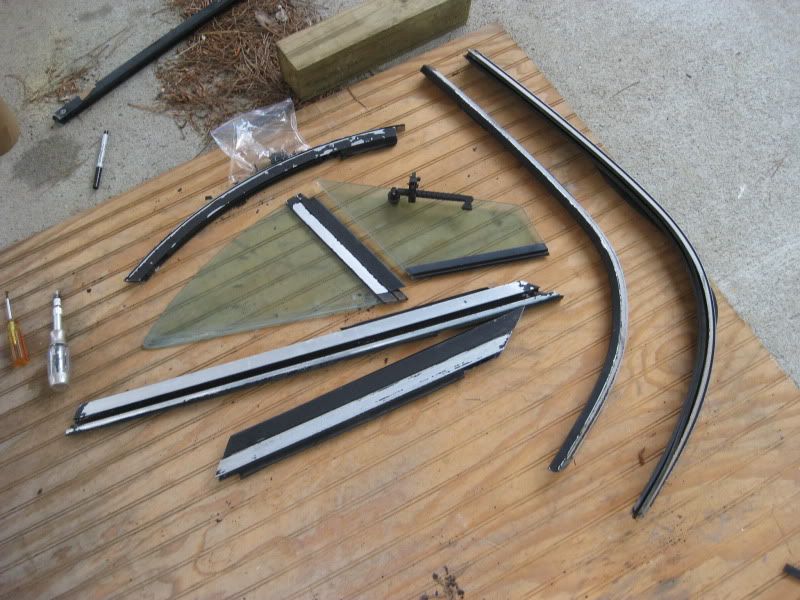
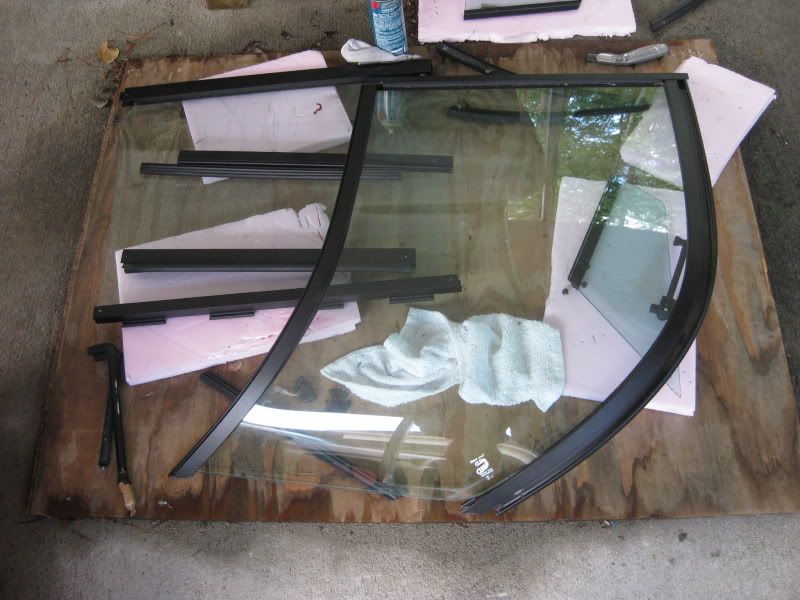
Here's a few pics of the windshield. I decided to get all the parts powercoated flat black instead of painting it since it should be a little more durable.
Before
After
Also a shot of about a 1/6 of the boat wet sanded and buffed (no polish yet) before it went to the fiberglass man.
I'll say it should turn out pretty well once I have a chance to finish it.
Banned
That is awesome. Props to you for stepping up and saving this boat. Most of the time, boats in this shape end sitting in someones back yard for eternity. It's great to see folks not afraid to tear into projects themselves. In a two or three years, once I get a V-drive, I am going to do something similar to my Outback, as it needs new carpet and vinyl. My wife also wants a dedicated ski boat, so the tower and all that stuff will be removed. My windshield needs a repaint to, maybe I will go the powdercoat route.
One thing I have noticed about our boats when looking about replacing the carpet,you can probably see how it is underneath the seat bases and hull top. To do a carpet replacement of factory quality, I am planning on splitting the hull at the rubrail. With your boat at this level of deconstruction, you might think about doing the same. All that is required it to pop off the rubrail insert, and then remove a bunch of screws, and the top can be lifted off the bottom. It m,ight be pretty flexy and it might require a few extra hands to lift it off, but i seems that it might make the carpet install much easier.
Good luck, and keep the posts and photos coming. Very cool!
Member
Thanks! I have a lot more pics to post I'm just slow at doing it. I found a soft spot in the floor so the whole floor got replaced which means the top came off. Stayed tuned.
Senior Member
98Roo, your pictures are worth a million bucks to me. I've been fortunate to have a well maintained boat but if I need to dig in sometime I have pictures to look at. A few thinhs to think about is the window frame for that year would spread apart at the walk-thru so reinforcing the frame on the drivers side with another small screw keeps the top frame from pivoting. Another area I need to fix someday is the edge around the sear where the observer sits. It appears that people (including me) would stand on the cushion and the Fiberglas was strong enough so there is a crack. I put a board underneath to keep it from flexing but glassing in some reinforcement would fix the problem. I have 500 hours on mine and other than some seat cover replacements that is about all I did.
Great job and thanks for my library pictures. Hopefully, I won't need them.
1998 Mobius
310 HP PCM
SOLD
Member
Glad I could provide you with some pics! I might consider reinforcing the windshield with more screws. It appears it has spread out because I can tell where the walkthru window has been rubbing on the drivers side windshield more at the bottom than the top. It was rubbed to a razor edge on the bottom! Something I also learned with powder coating is it is like glue. My windshield has two hinging parts where the front glass meets the side pieces and they have to move in order to install the windshield on the boat. I ended up having to strip these pieces and get them re-powder coated with the channels masked off so they could pivot. I'll paint the bare aluminum parts once the windshield is on the boat.
Also if anyone ever needs the screw cover foam and windshield gasket for this year like I did, buy the Taylor Made kit from greatlakesskipper for the 196 Cobalt windshield. It comes with the screw cover foam(1/2"x3/4"), gasket, a few new rubber gaskets, the little plastic windshield standoffs with the rubber tips, new stainless screws, and the turn latches to lock the windshield. Saved me about $50 over buying the foam and gasket by themselves and the extra stuff was a bonus.
Last edited by 98Roo; 06-10-2012 at 08:20 PM.

 Reply With Quote