Member
Point taken. Next time they fall off, I'll use epoxy. And I'll put post bolts in the blocks to make it easier to attach/detach the amp. Not a fun process as it stands. Thanks for the tips.
Member
You caught me. I am running a Speakeron cable for my tower speakers. What did you mean by PA? I was thinking you were talking about a microphone-type loudspeakers setup, which I don't have.Originally Posted by JoeTechie
As for gluing, I'd definitely go the epoxy route. Make sure you contour the blocks to fit the surface well, and you should have no problem. The first round, I used a basic wood/metal/plastic epoxy found at Home Depot. For round two (expanding the amp rack for larger amps), I added two more blocks and re-glued one using 3M Marine Adhesive Sealant. This stuff is designed to bond fiberglass and wood. Perfect! And found it at the local Home Depot.
I really like the mounting posts, instead of just screwing into the blocks. I've drilled the holes a bit larger on the amp rack, and use large washers beneath the wing nuts. This allows a little bit of "movement" of the amp rack when the boat starts bouncing hard.
So I ran all my cables, installed the Speakeron cabling up to the tower, and have made a template for my new amp rack. I'm working on wiring and mounting it, and building the sub box. More pictures to come .....
07 Supra 21v
Senior Member
I was talking about the mic/amp/speaker PA. I've never heard of using speakeron connectors in car audio. Though - you are probably just cutting it off and using the thick speaker cable inside and the convienince of a single round cable vs zip-cord like speaker cables. That is going to be a pretty big hole to drill in the tower though !
Post more pics when done !
-Joe
Member
So I have finished the install. Here are a few more pics of the progress.
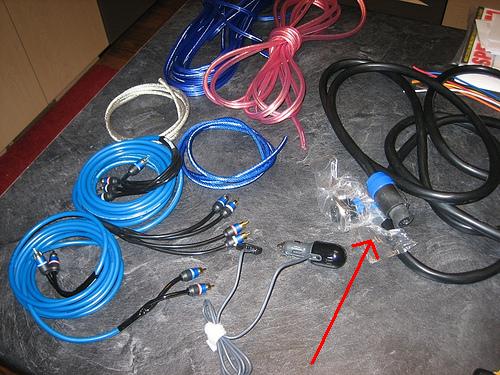
Running the wire for the tower speakers wasn't too bad. As JoeTechie pointed out, I'm using a Speakeron cable to wire up the speakers. The reason I chose this was that it has 8 wires (look to be 14-16 gauge) that terminal in a nice locking plug. Since my tower is completely removable, I didn't want to hard-wire anything in the tower.
First was to make the hole for the plug in the gunwale. I taped it up, drew my outline, and started drilling. I then used a dremmell to finish up the opening.
I then re-taped and marked the mounting screw locations. Then drilled those holes.
I wired up the back of the plug, attached the speaker cable, and used some silicone to ensure they stay put.
I used a cone-shaped dremmell bit to round off the edges and take the gel coat back a bit. This should help prevent any spider cracks from forming.
If I had to do this again, I would have made a wooden backing plate, drilled the mounting holes bigger, and screwed into the wood (much like towers and typically mounted). I did get a few little chips in the gel coat, but they're really small. Learning experience I guess!
I then taped and marked the places in the tower where I had to drill to run the cable. I used a center punch to dimple the holes, and then went to town with a uni-bit. These bits are sweet, they are shaped like a cone, and are great for this type of task.
Since my tower has hinges on both the front and back supports near the top (to fold down), I had to drill 3 holes in all. After drilling, I removed the tape and used a file to smooth the edges down.
Running the cable was fairly easy. This cable has 8 wires with a strong plastic jacket surrounding them. A little soapy water will help the cable slide. I just started feeding the cable from the bottom, slowly pushing it up the support. To pull the cable out of the holes, I used a long pair of needle-nose pliers.
When all was done, you could barely notice the cable.
I'm running a pair of AudioFormz twisted enclosures with Polk MOMO MMC650 speakers. These are 2-way speakers with external crossovers. They are marine certified, so they should last.
On to the sub box. I'm using a JL Audio 10W3v2, dual 4Ohm sub. These things are amazing! I'll never use another brand. I decided to follow the recommended specs from the manufacture, so my box was 18" x 11" x 9". I used 3/4" MDF to construct the box.
One tip I have is when drilling for the screws, use a large bit in reverse to recess the top of the hole a bit. This will help the screws sink in flush with the MDF.
Also, brace the box as much as possible. And use tons of glue to seal the box. These two things can make a huge difference.
This system cranks. The sub is ridiculous. I'm running the Polk MOMO MMC650's all around, and they sound great. I'm still dialing in the amp gains and crossovers, and doing some finishing work. I'll have a few more pictures to come of the finished amp rack and sub enclosure.
07 Supra 21v
Member
A quick update. Finally did some finish work on the amp rack.
Removed the old MDF and cut a new one that would stretch from the rub rail down to the floor. Beveled the lower edge and then glassed the bottom since it might get a little wet at times.
Positioned the amp, drilled holes as necessary for the cables and wires.
Wrapped in marine carpet.
I glued little metal finishing washers to the front side to mark specific mounting holes. Putting a screw through these insures they end up in the mounting blocks glued to the side of the hull.
Here's the rack, fully installed.
One suggestion is to use a soldering iron to cut/burn the carpet where you have holes drilled for cables/wires. The iron will slice right through the carpet, and effectively melt the cut so that the carpet doesn't fray. Worked like a charm.
07 Supra 21v
Senior Member
curious if you are powering your system with the stock alternator and dual batteries or if you upgraded? thanks
Wow, just awsum. How much time start to finish? How much would that install have cost you if you had a shop do it?
Member
When I bought the boat, it only had one battery. So I've added an Optima yellow top and Perko switch. I'm still running what looks like the stock alternator. I have been considering upgrading it though, my batteries never seem to get a full charge, even after a ton of straight riding.
Thanks! It's taken a good amount of time. I just keep doing step by step until it's all finished. I'd say I have 15 - 20 hours thus far, but a lot of that has been re-installing and changing things until I like the way it looks.
Next project is to trim out the sub under the dash with a little fiberglass and carpeted trim panel.
07 Supra 21v
Senior Member
Looks great. I am curios on were you are goung to install the bass box? Would like to see pictures when you are finished. Very nice and clean install.
 Posting Permissions

 Reply With Quote