 Replacemnt of Axle on 2008 single axle boatmate trailer
Axle install on 2008 Boatmate single axle trailer.
WARNING: After doing this I would suggest taking it to a shop and paying for it to be done. Use this as a reference at your own risk.
After talking this over we have decided it is better to have the boat on the trailer since it adds weight. Also I have limited photos due to a blurry camera.
Tools Needed:
WD40 – Stop now and go spray every one of the bolts and the splines holding the trailing arm and axle
Magnetic protractor
13/16 socket Deep socket
1 5/16 socket- Do not get deep sockets for the rest
15/16 socket
Breaker bar for socket
Impact wrench for sockets
3/8, 5/8 or 7/8 wrench, socket (used for brake lines and cannot remember what “/8” I used)
1 5/16 wrenchor 12 in adjustable wrench
15/16 wrench
10 in adjustable wrench
4 jack stands
2 jacks
7mm Hex (I think it is a 7mm and is used for brake caliper)
NOTE: you can use two jack stands and 4 jacks
1 tow vehicle
Blocking for trailer tires (needed to help bleed brake lines)
Zip ties
Anti-seize lubricant
Loctite 242
Dot 3 brake fluid
Torque wrench that goes to 150 foot pounds
Small Hammer
Sledge hammer
Two pry bars (one big, one small)
Wedge or thin chisel (can also use the pry bar)
Flat head screw driver (one small to medium, one heavy duty)
Some sort of padding
Two to four people to help
Time and water
1. Hook the boat trailer to the tow vehicle. Set parking brake. This is used for an anchor point.
2. Remove both fenders for better access.
3. Loosen lug nuts on tires using breaker bar and 13/16 deep socket.
4. Jack up trailer on one side and remove tire
5. Install jack stands behind the axle and in front of the axle leaving room to work.
6. Lower first side of trailer onto jack stands.
7. Repeat steps 4 to 6 on other side.
8. I recommend removing the Fenders on both sides to give more working room. It is 4 bolts per side.
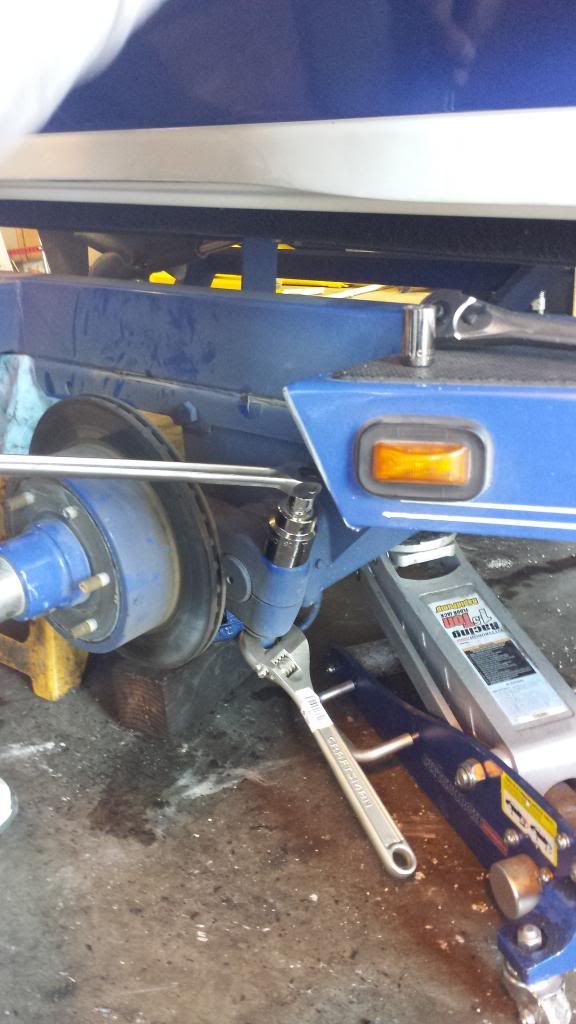
9. Remove brake caliper on both sides using hex. There should be a cap on the back side of caliper that can be removed with your fingers. There are two hex screws for each caliper.
10. If you are on the good side use the magnetic protractor and mark the angle of the trailing arm. Also mark where you placed the protractor since you will need to use the same spot.
11. Using the impact wrench, 1 5/16 socket and 1 5/16 wrench or 12in adjustable wrench remove bolt connecting the trailing arm to axle splines. (Picture shows us using breaker bar but impact gun is a lot faster)
12. Remove bolt from trailing arm. You will have the bolt, washer and nut. Put these three items back together and set aside.
13. Use a wedge, thin chisel or pry bar to increase the gap on the trailing arm.
NOTE: Picture shows the bolt in. Remove the bolt. Also picture is the install of the trailing arm but the pry bar to gap still apply.

14. Place the padding under the trailing arm where it will drop.
15. Use the pry bar to remove the trailing arm from the axle. (NOTE: This is a lot of work and you might have to keep using the pry bar to increase the trailing arm gap. Also, check your jack stands periodically since the trailer will probably move during this operation.)
16. Again, re-check your jack stands and adjust if needed.
17. Repeat steps 8 to 15 on other side.
18. On the left side of the trailer use the “/8” wrench to disconnect the main brake line coming into the axle.
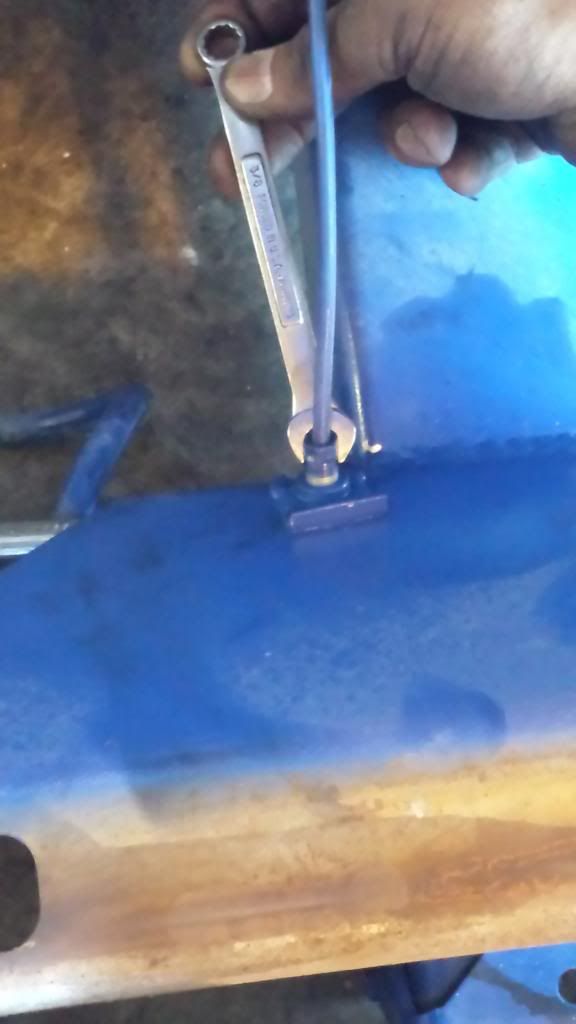
19. Remove the “T” for the brake line using the “/8” wrench and the 10” adjustable wrench.
20. Remove the clip holding the brake line that is going to the brake caliper using the flat head screw driver and the hammer.
21. Use the flathead screw driver to remove the brake line from the axle clips.
22. Go to the right side of the trailer and remove the brake line by repeating step 19.
23. Place a jack under both sides of the axle for support. DO NOT jack up the trailer.
24. Use the 15/16 socket on the impact gun and 15/16 wrench to remove the two bolts connecting the axle to the trailer on each side.
25. Use the two jacks on the axle to lower both sides at the same time.
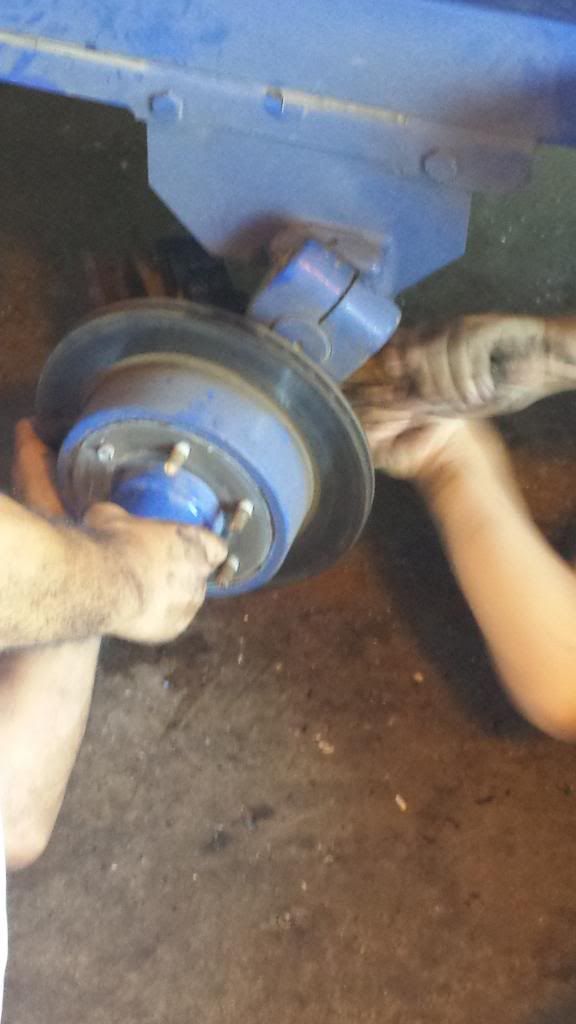
26. Pull axle out from under the trailer
27. Slide new axle under trailer.
28. Using the two jacks position the axle to line up with the four bolt holes.
29. Reinstall the 4 bolts.
30. Use the torque wrench and torque to 150 foot pounds.
NOTE: make sure brake lines are clean before reinstalling
31. Reinstall brake line going to the caliper and clip to hold in place on both sides.
32. On left side reinstall brake line “T”.
33. Reconnect brake line that goes across axle.
34. If you do not have clips on new axle you can use zip ties to hold in place until a final solution can be put into place.
35. Attach main brake line on left side to “T”
36. Clean splines and liberally apply anti-seize to splines.
NOTE: trailing arm will need a gap between it and the Axle back plate.
37. Position trailing arm on splines at the same angle of the good side that you remove it off at. (NOTE: original angle from Boatmate is 18 degrees below horizontal for an unweighted level trailer)
DO NOTE install trailing arm with bolt in.
38. If the trailing arm does not want to go on use pry bar and place it in the gap and use the sludge hammer to drive trailing arm in.
39. Once trailing arm is in place install bolt and tighten to 150 foot pounds of torque.
40. Repeat steps 35 to 38 for the other side.
41. Reinstall brake caliper using Loctite 242 on the hex bolts. Torque to 55 foot pounds.
42. Repeat step 40 on other side.
43. Jack up trailer Reinstall tire and remove jack stands.
44. Clear all tools from area
45. Loosen the bleeder valve nut on the back of both calipers.
46. Drive forward and press the brakes until you see brake fluid coming from the left caliper. At this time tighten the left caliper’s bleeder valve nut.
47. Drive forward a few more times hitting the brakes. Check brake fluid in the tongue reservoir. If low fill.
48. Repeat step 46 until fluid comes out of the right brake caliper. (You might need to drive around the block but keep rechecking the tongue reservoir so it does not run dry.) At this time tighten the bleeder valve nut.
49. Recheck brake fluid in the tongue reservoir. If low fill.
50. Grab a cold one since you have just had a long day.
51. Go to the lake.
Last edited by jester; 07-24-2013 at 01:56 AM.
Reason: added a few notes.
2008 Outback V - Sold but never forgotten.
Do not wait; the time will never be just right. Start where you stand, and work with whatever tools you may have at your command, and better tools will be found as you go along." -Napoleon Hill


 Senior Member
 Posting Permissions


 Reply With Quote