Senior Member
I wanted to upgrade my stock ballast system without drilling any additional holes in the boat, reusing as much of the stock stuff, and keep the cost down. I only run 1310 lbs of ballast (455x2 + 400) for wakeboarding and 1150 lbs for surfing (750x1 + 400) so I didn't want/need to go all out with three T-1200's on separate 1" intakes.
So this is what I decided to do:
- Replace stock 3/4" intake with 1". Use 1" tees and valves.
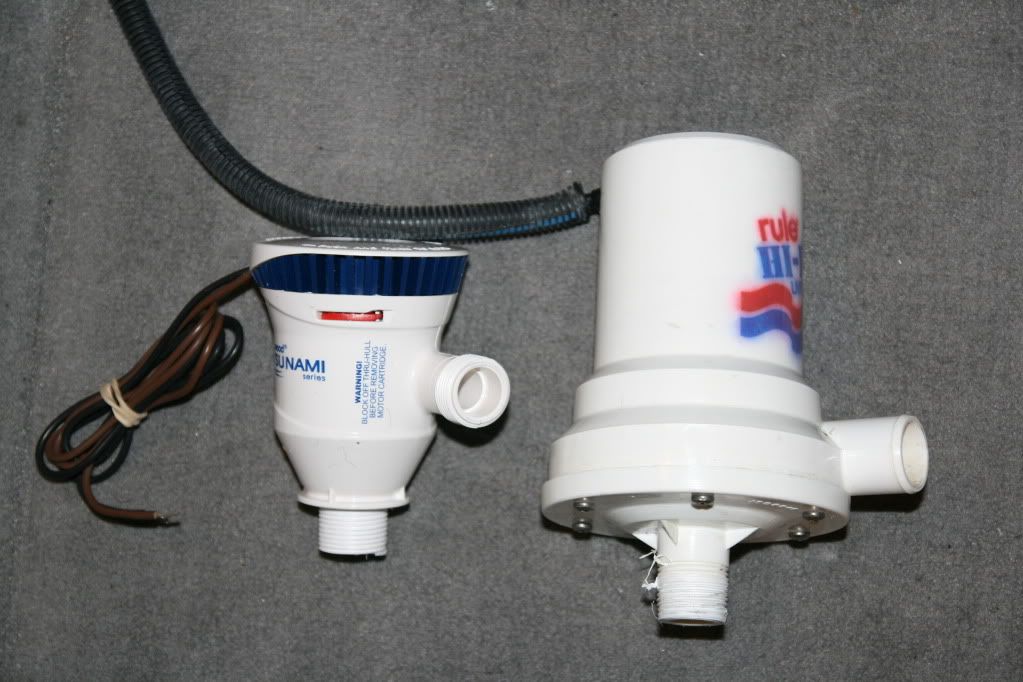
- Install one pump per bag - a Tsunami T800 for the starboard side rear locker, another T800 for the ski locker and the stock Rule 1200 gph pump for the port side locker since this is where we use the 750 lb sac (for surfing).
- Reuse 3/4" fill hoses for the T800's, use 1" fill hoses for the Rule since the Rule outlet is 1".
I did the install this past week and lake tested it today.
With the stock system, my fill times were:
- 14:55 for all three sacs (1310 lbs)
- 13:06 for just the 750 lb sac
With the upgraded system, my fill times improved to:
- 8:58 for all thee sacs (1310 lbs)
- 6:00 for just the 750 lb sac
Instead of using vented loops to prevent auto filling or auto draining at speed, I used brass swing check valves for the rear bag fill lines and just a looped hose for the front bag (admittedly, not as high a loop as I wanted) so I am having some issues with auto filling/auto draining that I need to sort through.
UPDATE: I installed a 3/4" Irritrol 700 Ultra Flow valve and this fixed my auto drain and auto fill issues with the front sac. See pg 5 of this post for pics and description.
Overall, I am super happy with the results, especially with the 6 minute fill time of the 750 surf sac!
Now for some pics:
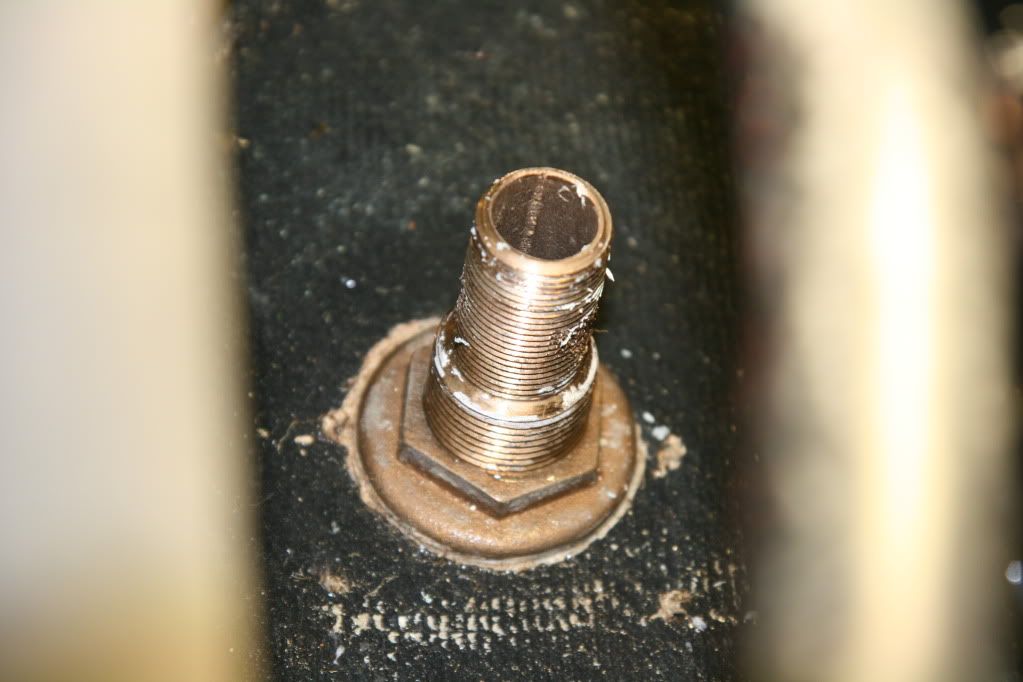
This is the stock 3/4" intake. Note that it steps down from 1" so I did not have to enlarge the hole to install a new mushroom type 1" intake.
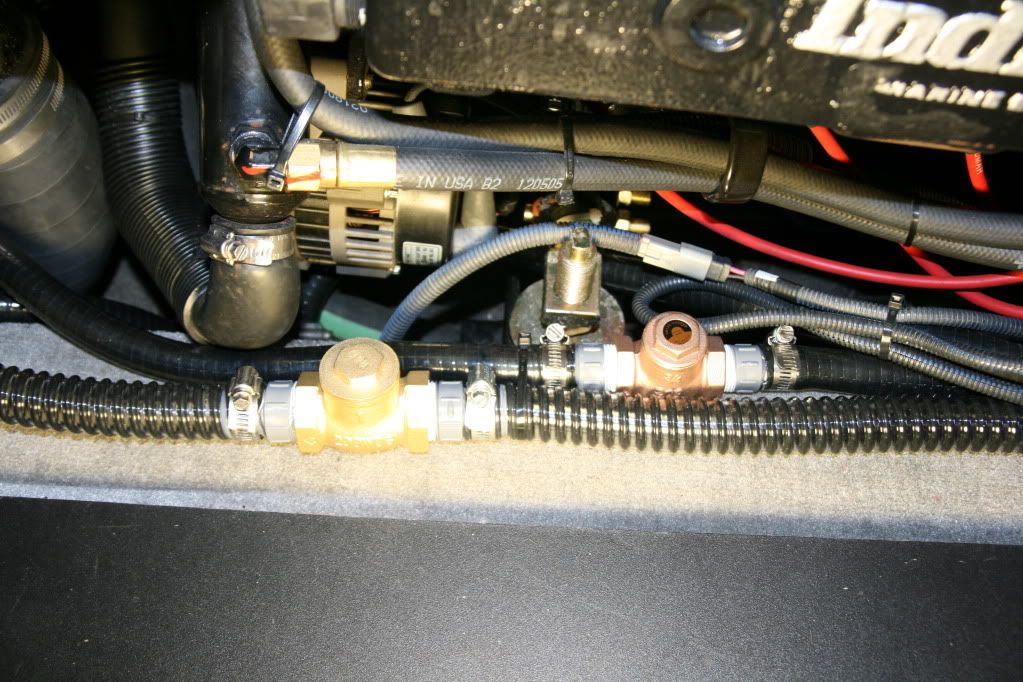
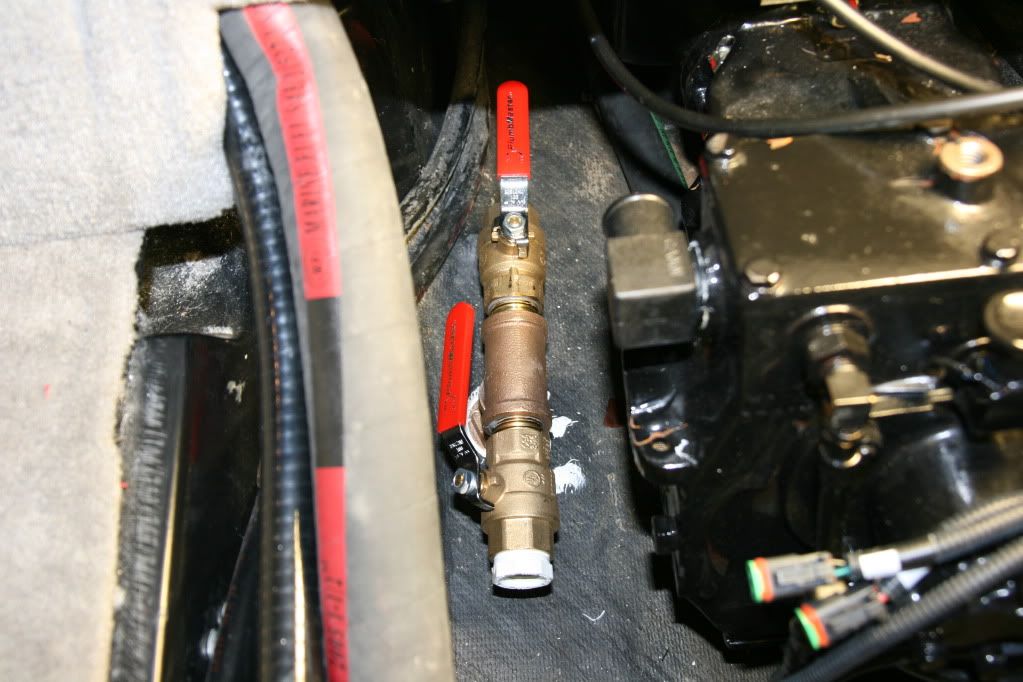
New 1" intake, 1" tee. and 1" full port ball valves installed. Note the 1" to 3/4" white plastic bushing installed on one of the valves to allow the 3/4" intake of the pumps to thread into.
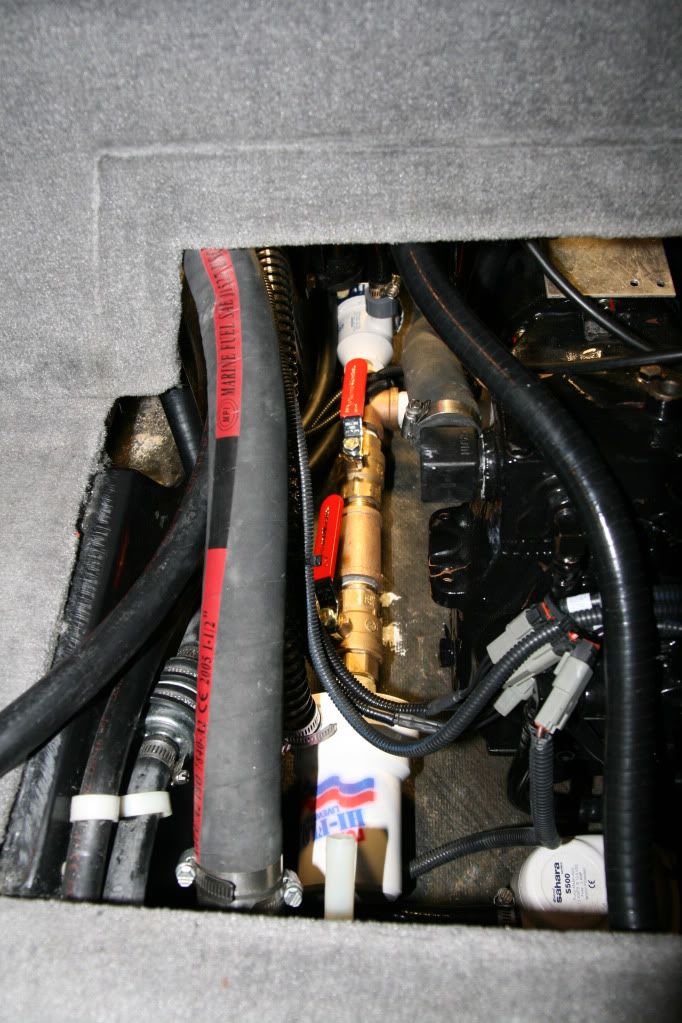
Here you can see the Rule installed on the ball valve at the bottom of the pic, and a tee installed at the other ball valve with two T-800's attached to the tee. You can barely see the T-800 to the right of the tee, under the large raw water hose.
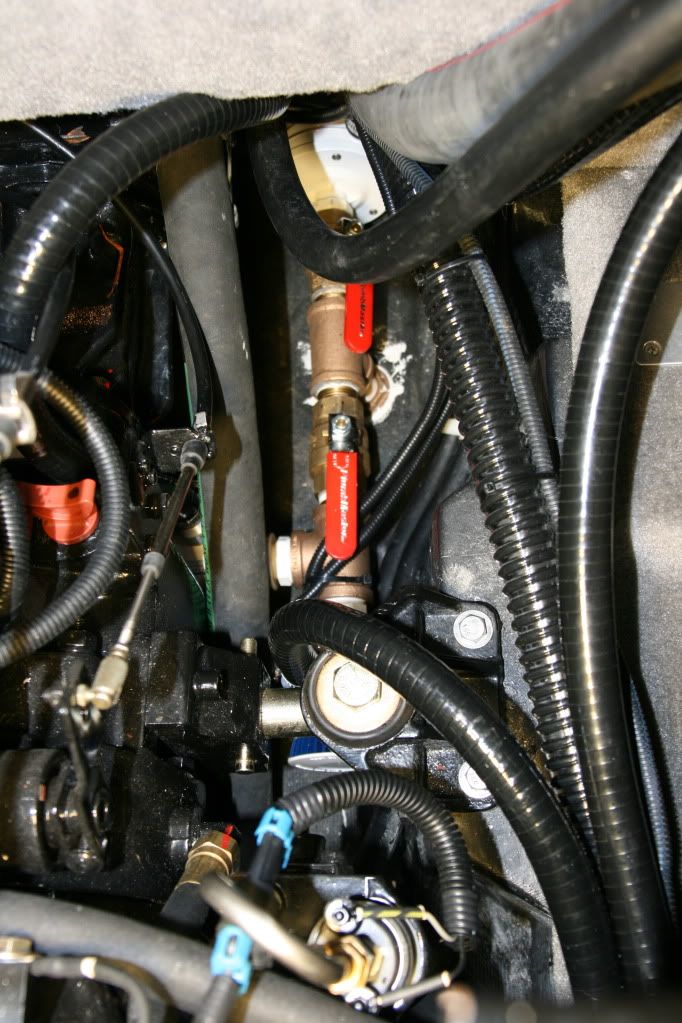
Here's a shot from the other end. You can see one T800 under the motor mount and another to the left under the large raw water hose.
Last edited by cab13367; 06-02-2010 at 01:05 AM. Reason: Edited fill time for all three sacs based on a recent retest
Al
2006 Mobius LSV
Senior Member
These are the brass swing check valves that I used. They are less than $9 each including the fittings compared to about $20 for the more common rubber check valves. But the main reason I went with the swing check valves is that they have a large orifice so it will have very little if any effect on the flow rate. I was having some auto draining issues with the valves mounted horizontally so I mounted them at an angle and that took care of the auto draining issues. See pg 5 of this thread for an updated pic.
Attwood Tsunami T-800 next to the stock Rule
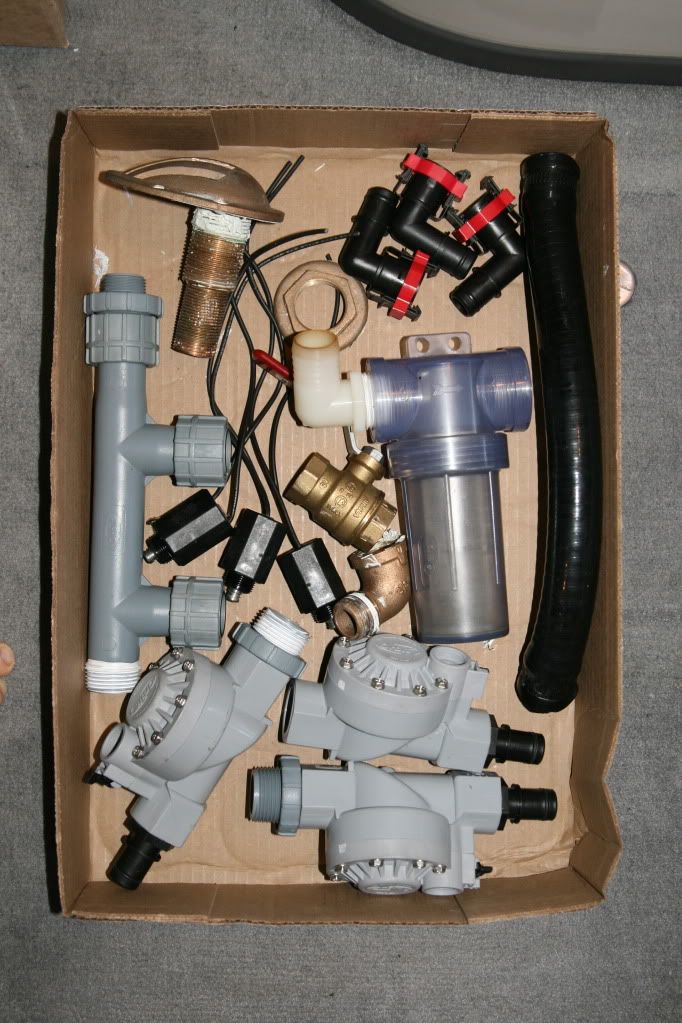
Here are all the stock parts I pulled out. Maybe I'll bring this to the Oregon MiniJam and throw them in the bonfire
Last edited by cab13367; 06-02-2010 at 01:08 AM.
Al
2006 Mobius LSV
Member
looks clean !!
never enough ...
------------------------
2005 Mobius XLV
Senior Member
I was going to post a question just before i read your post, hahah. This is the same system I am going to put in. I was just curious about the 3/4 intake, but it is really a 1 inch that is stepped down. This is going to make my life so much easier. I really hate the sprinkler valves and the single intake pump. Thanks again!
Super Moderator
Lookin' good, Al! More time to surf.
My Mom said I'm not allowed to get wet!
2008 LSV (sold)
2000 Outback LS (sold)
LLTR!!!!!!!!
Junior Member
looks great! where did you find the brass swing check valves? have you had problems with autofill or drain with the rear sacks at all, or just the ski locker sack?
Senior Member
Al,
All that brass and no leaks?
Must have been tight in there tightening everything down??
Came out real nice and clean! Great post!
2007 Moomba Outback - going, going, GONE
2015 "NOT A MOOMBA"
Why Not? Play Hard! Get wet
Senior Member
can anybody tell me if the stock scupper is a 1 inch, that I would be able to cut off the 3/4 part as in the picture and make it a the one inch so I don't have to change the fitting?
Senior Member
The internal diameter is 3/4" all the way thru, so cutting it off at the taper wouldn't gain you anything unfortunately.Originally Posted by saskie99

Senior Member
Very nice upgrade, Al. That's a big drop in fill time.
I'm having good luck with my one-way check valves on the rear bags as well. Cheaper and easier than vented loops, that's for sure.
 Posting Permissions

 Reply With Quote