Senior Member
I am in the process of installing a Heater Craft three outlet heater in my boat so I thought I would post up some progress pics. I bought the complete kit including three extendable heater tubes from go2marine.com for $396 + shipping. Many thanks to csmsk (Chris) whose detailed install post inspired me to tackle this project.
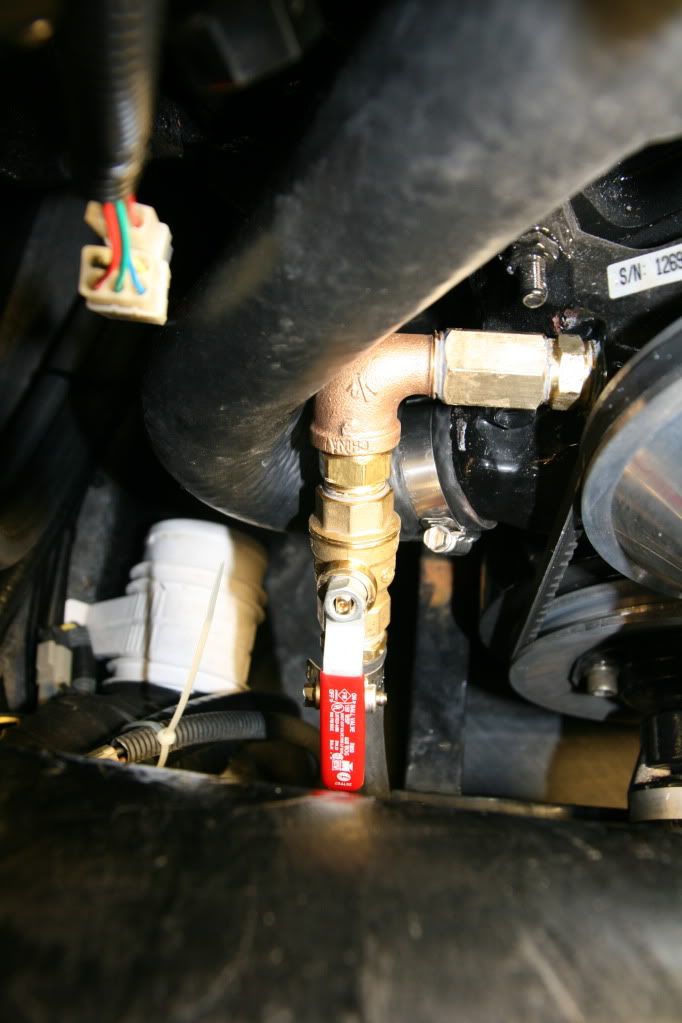
Most installs I have seen that incorporate shutoff valves have a short length of hose between the engine and the shut off valve. The obvious issue here is if that hose leaks, the shut off valve won't do any good since the hose is before the valve. So I decided to install a series of brass fittings (all from Home Depot and Lowes) from the block to the shut off valve, both at the supply and the return. This way, if I get a leak anywhere in the hose, I just shut off both valves and I'm good. I can finish out the day and fix it when I get home. Below are the pics:
This is the supply line. There used to be just an allen head plug here. I used pipe joint compound at all the threaded joints.
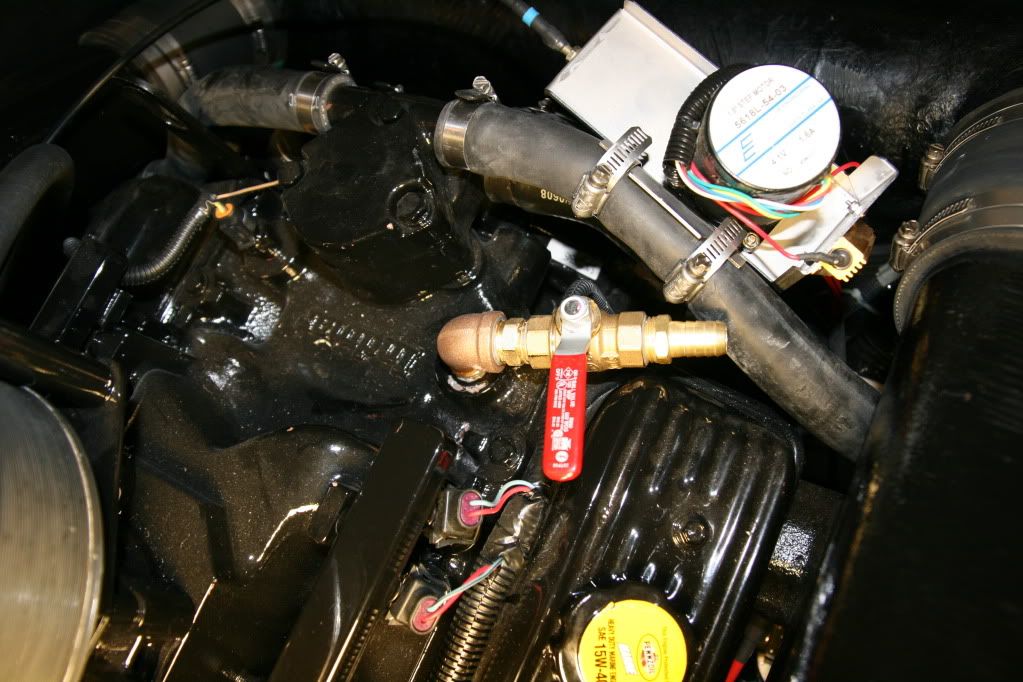
This is the return line. It's tight but it clears the recirc pump hose. There used to be just a square head plug here.
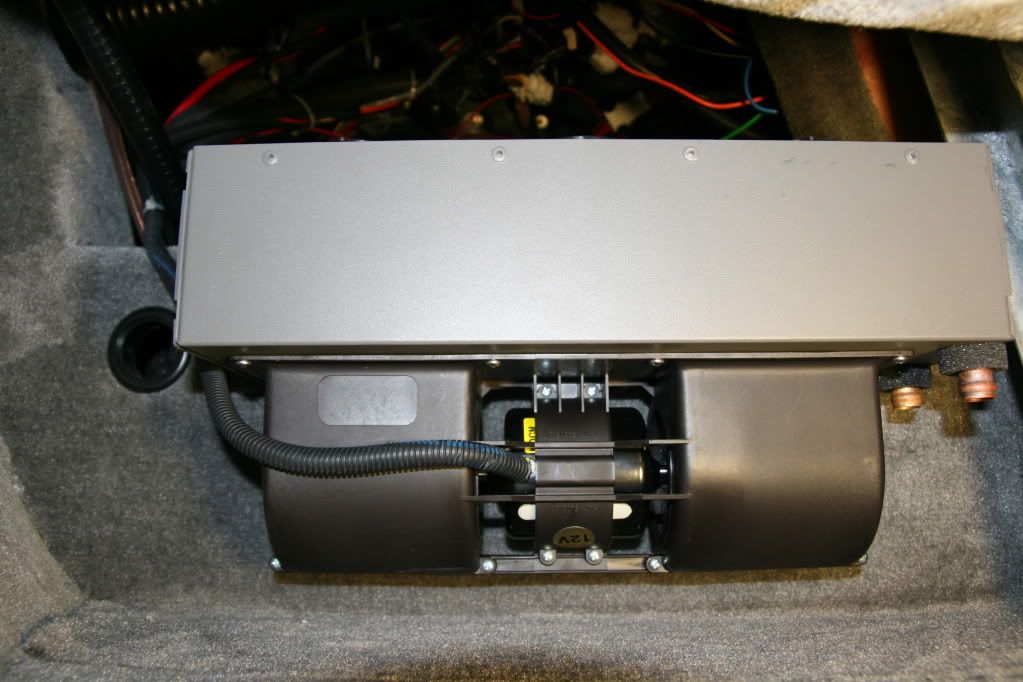
This is the heater core mounted on the front of the footbox and electrical wiring wired to a spare switch on the dash. You can see the 2" hole on the left thru which the heater hose will be routed. I drilled the hole fairly high so that if I take a bunch of water over the bow, hopefully, it won't make it into the footbox. I can't come up thru the existing hole in the top of the footbox because when my sub enclosure is in place, there is no room for the two hoses. It was a royal pain to install this heater core because of the cramped space you have to work in.
That's as far as I've gotten. Will be removing the floor next and run the heater hoses from the engine to the core. Then the fun part - drilling three 4" diameter holes in the gelcoat for the heat tubes
Al
2006 Mobius LSV
Senior Member
NICE start Al! I like your thinking on the valves!
2007 Mobius LSV
Super Moderator

If you need any help Al holler man. Whether its physically working or i can drink the beer for you and tell you how relaxed i am to help you relax while you drill holes in the boat haha
Malo <--- Means--Evil or Mean One. This explains a lot.
2013 Mojo 2.5 Skylon Tower. Bestia < Beast >
[COLOR="#696969"]
Super Moderator
Al, as always-awsum work and great attention to details.
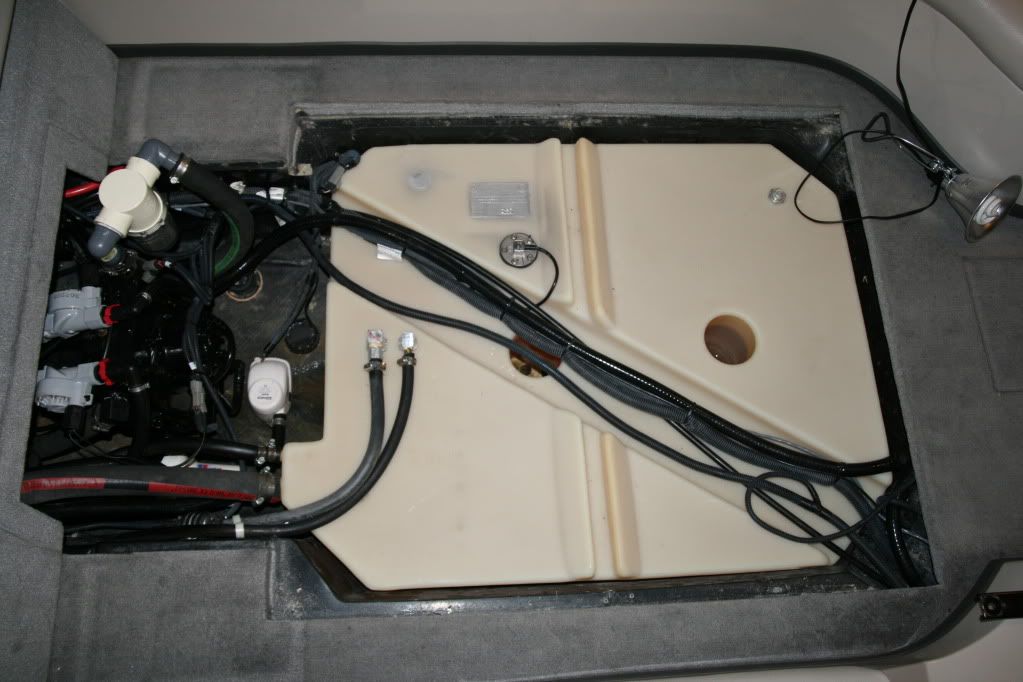
btw, what is that gismo hoseclamped to the cooling hose in picture 1
Hey, Its Moomba time
Its all about the dash - enjoy the dash, as that is your time between the dates
13 Mobius LSV-sold
08 Mobius LSV-sold
03 Mobius LSV-sold
life is about finding the balance between being a responsible adult and staying young at heart
Senior Member
Al that is a great start. Good to see you where able to the the engine plugs out and the valves in.
2008 Outback V - Sold but never forgotten.
Do not wait; the time will never be just right. Start where you stand, and work with whatever tools you may have at your command, and better tools will be found as you go along." -Napoleon Hill
Senior Member
Thanks for the encouragement, guys.
Moombadaze, that is the PerfectPass servo unit in pic 1. Don't you love how they installed it? Just hose-clamped it to a hose? Oh well, I guess it works.
Tonight, I installed the heater hoses from the engine to the heater core.
Ever wonder what it looks like under the floor of your LSV? Well, here you go. There are two panels, and 4 screws per panel. Remove the screws and pull up the panels and this is what you see. I don't think it's necessary to pull it out but I did just to make it easy to run the hoses.
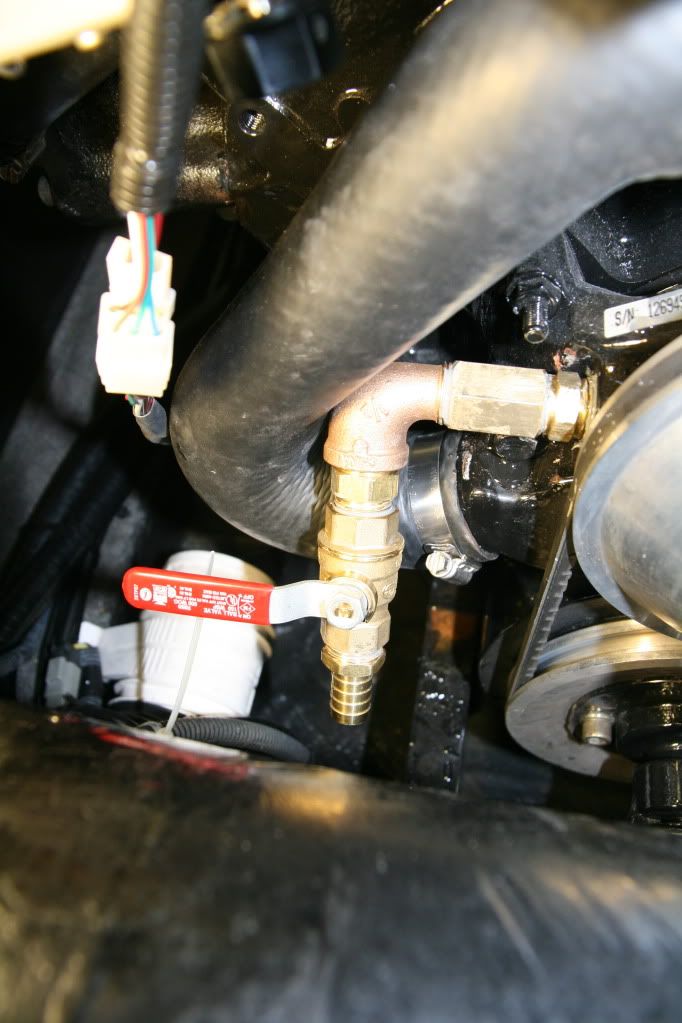
Here's a pic of the shutoff valves at the block with the hoses attached.
Al
2006 Mobius LSV
 Posting Permissions


 Reply With Quote